Need any help or advice?+44 (0)1782 454499
USED IN THIS PROJECT
Although not necessarily an exhaustive list, the following tools and materials, supplied by Easy Composites, were used in this project.
The quantity shown below is the approximate amount used in the project rounded up to the nearest available kit size or quantity.
MATERIALS & CONSUMABLES
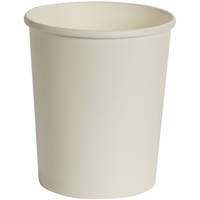
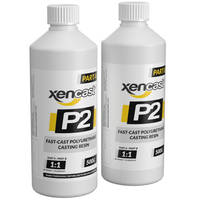
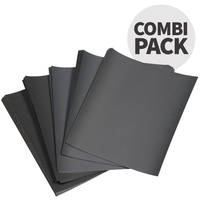
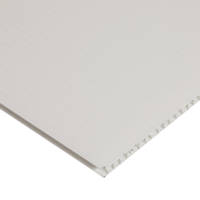
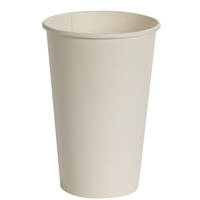
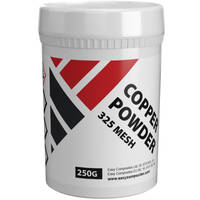
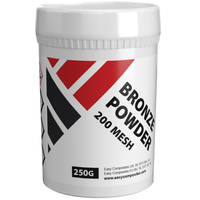
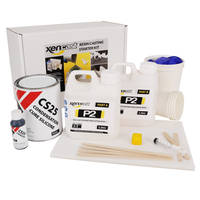
VIDEO TUTORIAL
Rotocasting by Hand - How to Cast Hollow 3D Shapes
Follow this step by step guide to create a stunning hollow 3D casting by using the hand rotocasting technique - no expensive rotocasting machines are needed!
Sometimes you may want to create a solid 3D object but do not want or need the additional wasted resin or added weight associated with a solid casting. Also on larger castings, you may not be able to pour a solid casting in one go due to the volumes of resin needed - in this case a hollow casting may well provide the solution.
The method to create such castings is called rotocasting, which in this video we are demonstrating the technique to do this by hand. With a bit of care and practice, you can create high quality rotocastings by hand without the need for expensive rotocasting machines.
To do this project, the main materials used can be found in our Xencast Resin Casting Starter Kit. First of all, we demonstrate how to make the first half of the 2 part silicone mould using the CS25 Condensation Cure Silicone used within the starter kit. The second half of the mould is poured once the first half has fully cured and has been coated with a thin layer of petroleum jelly as a release agent.
Once cured, the completed mould is used to make the first hollow casting. The key is to work quickly as the P2 Fast Cast has a short pot-life. Once the resin is poured into the mould, you need to quickly seal it and tape it up then start rotating the mould by hand. You need to rotate it in all directions as randomly as possible to ensure an even coating of the resin and an even end thickness. You should continue to rotate the mould for at least 5 minutes. Once the casting has been left to cure, you can demould your casting.
We decided to demonstrate making a second casting by coldcasting our range of Metal Powders to create a stunning metallic effect casting. For further detailed description of the cold casting process, then we recommend you also watch our tutorial video on Cold Casting using Metal Powders.
In addition to the shopping list items to the right you would also need the following items to complete this project - a glue gun, steel wool, black spray paint, a cutting board and a craft knife.
TUTORIAL BREAKDOWN
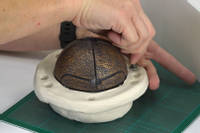
1. Creating the split-mould
Embed the original halfway in modelling clay and smooth the surface. Then create keys all over the surface - this will lock the two sides of the mould together. Then build a mould box around the original and clay.
Now weigh out the silicone and catalyst and mix together until a consistent colour is reached. Mix steadily to minimise air getting trapped in the mixture. Pour over the silicone until it covers the part by a minimum of 10mm and leave to cure for 24 hours.
Once cured remove the mould box and the modelling clay - do this very carefully so the original does not get dislodged, it needs to remain in exactly the same place. Then rebuild the mould box around the bottom part of the mould and you are ready to create the top part of the split mould.
Silicone will stick to silicone so you need to apply a thin layer of petroleum jelly all over the surface.
Then repeat the silicone process, pour over the part and leave to cure for 24 hours. Once cured, remove the box and the original.
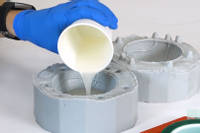
2. Rotocasting a sphere
Weigh out equal amounts of the Xencast® P2 Fast-Cast Resin according to the manufacturers instructions and mix together. This resin begins to cure in 2-3 minutes so you will need to work quickly. Pour the resin into one side of the mould and seal the two parts together with tape.
Rotocast by hand, rolling constantly and randomly for approximately 5-7 minutes to be sure the sphere has an even coating inside the mould.
The Xencast® P2 cures in under 30 minutes, so once cured you can open the mould and demould the part. If the part has any flash lines these can easily be removed by hand or with some abrasive paper.
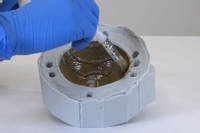
3. Rotocasting a metallic sphere
Measure out a small amount of resin and heavily load it with your chosen metal powder to create a thick slushy mix and brush onto both sides of the mould. Then measure out a lighter resin mix with a small amount of metal powder in and pour into one side of the mould.
Tape the mould up and begin rotocasting - this time because of the addition of the metal powder you will need to rotate the mould for longer. This is because the metal powder slows down the curing process. Then leave to fully cure.
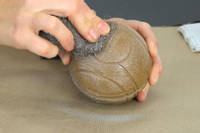
4. Revealing the metallic effects
Now demould the sphere, you will notice it does not appear metallic at all. This is due to a thin layer of resin forming a layer on the surface.
Using steel wool abrade the surface and the metallic effect will be revealed. If you want to add contrast like the sphere in the tutorial try spraying all over with black spray paint and then rubbing down again with steel wool to show off the detail.
DISCUSSION (0)
Please share any questions or comments you may have about this video tutorial.
LEAVE A COMMENT OR QUESTION
USED IN THIS PROJECT
Although not necessarily an exhaustive list, the following tools and materials, supplied by Easy Composites, were used in this project.
The quantity shown below is the approximate amount used in the project rounded up to the nearest available kit size or quantity.
MATERIALS & CONSUMABLES


DISCUSSION (0)
Please share any questions or comments you may have about this video tutorial.
LEAVE A COMMENT OR QUESTION
100% SECURE
PAYMENT METHODS
Easy Composites EU B.V., registered in the Netherlands 73601195. All content copyright (C) Easy Composites Ltd, 2025. All rights reserved.
