Need any help or advice?+44 (0)1782 454499
PRODUCTS USED IN THIS PROJECT
Although not necessarily an exhaustive list, the following tools and materials, supplied by Easy Composites, were used in this project.
The quantity shown below is the approximate amount used in the project rounded up to the nearest available kit size or quantity.
MATERIALS & CONSUMABLES
VIDEO TUTORIAL
Cold Casting using Polyurethane Resin and Metal Powders
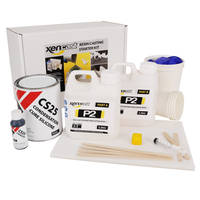
In this video tutorial we have used this fun project demonstrating how to turn a plastic toy into a unique cold casting using the Xencast Resin Casting Starter Kit and Metal Powders.
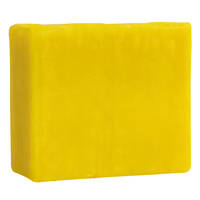
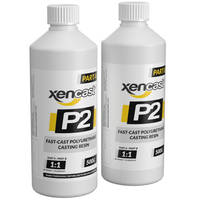
The step by step process using metal powders in resin casting includes creating a splash mould using the CS25 Condensation Cure Silicone Rubber & Catalyst then casting a splash part from Xencast P2 Fast Cast Polyurethane casting resin.
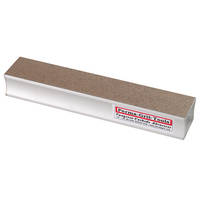
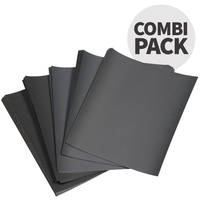
The splash part is then modified using Mirka abrasive paper and a Perma-Grit sanding block. The process is then repeated to create the final production mould with the CS25 Condensation Cure Silicone Rubber & Catalyst and cast the final metal part – adding the metal powder to the Xencast P2 before cold casting and finally revealing the amazing metallic effect and finish.
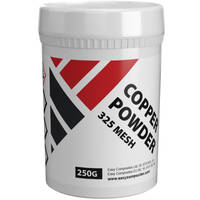
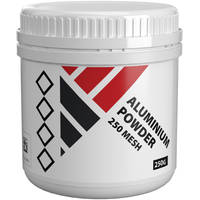
Different looks can be achieved using different metal powders – we have Bronze, Brass, Copper and Aluminium Powders available.
In addition to the items on the shopping list on the right you will also need - a glue gun, black spray paint, steel wool, a cutting board, a craft knife, a screwdriver and a small tube or rod.
INTRODUCTION

1. Preparing the original
If you want to create a mould and cast exact replica's of your original you will not need to create a splash mould and splash part - you can create your final and only mould straight away.
From the original toy we will be creating a bust piece (head and shoulders) so need to remove the arms and reposition the head. Then use filleting wax to plug any gaps like the one around the head and neck, this will stop any silicone leaking inside the toy.
Then create a mould box or use a ready made watertight container which allows for a 5-10mm gap all around the original, suspend the original from above using the tube and secure into place using the glue gun.
TUTORIAL BREAKDOWN
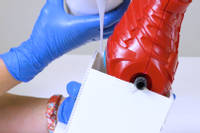
1. Creating a splash mould and part
To create the Splash Mould: Weigh out and mix the silicone rubber and catalyst. Mix steadily to minimise air bubbles and scrape the sides and bottom of the pot until you reach a consistent colour. Then pour over the original and leave to cure for 24 hours. Once cured remove the mould box and using a zigzag cut to remove the original from the mould. Finally tape up the splash mould ready for casting.
To create the Splash Part: Weigh out equal amounts of Parts A and B of the Xencast® P2 Fast-Cast Resin according to the manufacturers instructions and mix steadily. This resin begins to cure within 2-3 minutes so remember to work quickly. Pour the resin into the mould, tipping and rolling so it gets into detailed areas, then leave to cure.
The cure time for this resin is 30 minutes, then demould the splash part and make any modifications like reshaping the base and shoulders.
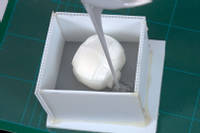
2. Creating the final mould
Use filleting wax to add to the base shape if required, it will also secure the piece to the base of the container. Create a new mould box, then repeat the silicone process and pour the final mould and leave to cure for 24 hours.
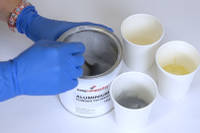
3. Cold casting the metal part
Tape the final mould up ready for use and measure out a new batch of resin.
Measure out your choice of metal powder by volume rather than weight equal to two times the volume of Part A of the resin and mix together until all the powder is mixed in. The add Part B and mix again thoroughly and pour into the mould. Then leave to cure.
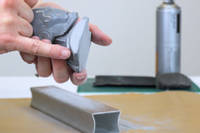
4. Finishing the cold cast part
When you first remove the part from the mould you will see it is metal coloured but it's appearance is not metallic. You will need to abrade the surface to reveal the effect.
Use a sanding block and abrasive papers to finish the base, then use steel wool to abrade the piece all over. As soon as you start to rub with steel wool you will reveal the metallic effect.
To create extra effects you can use a spoon on the surface to burnish the piece. This will create highlights which look amazing. We also used black spray paint all over the piece and them rubbed off again with steel wool to leave the paint in the recesses, this gives great contrasting detail.
DISCUSSION (0)
Please share any questions or comments you may have about this video tutorial.
LEAVE A COMMENT OR QUESTION
PRODUCTS USED IN THIS PROJECT
Although not necessarily an exhaustive list, the following tools and materials, supplied by Easy Composites, were used in this project.
The quantity shown below is the approximate amount used in the project rounded up to the nearest available kit size or quantity.
MATERIALS & CONSUMABLES


DISCUSSION (0)
Please share any questions or comments you may have about this video tutorial.
LEAVE A COMMENT OR QUESTION
100% SECURE
PAYMENT METHODS
Easy Composites EU B.V., registered in the Netherlands 73601195. All content copyright (C) Easy Composites Ltd, 2025. All rights reserved.
