Need any help or advice?+44 (0)1782 454499
PRODUCTS USED IN THIS PROJECT
Although not necessarily an exhaustive list, the following tools and materials, supplied by Easy Composites, were used in this project.
The quantity shown below is the approximate amount used in the project rounded up to the nearest available kit size or quantity.
REINFORCEMENTS
VIDEO TUTORIAL
How to Make a Roll Wrapped Carbon Fibre Tube
In this tutorial you can learn how to use a metal mandrel, prepreg carbon fibre and shrink tape to produce a bespoke carbon fibre tube using the roll wrapping process.
The roll wrapping process is used by composite manufacturers to produce high strength carbon fibre tubes, either with a basic unfinished appearance or with a cosmetic finished appearance. Indeed, Easy Composites carry one of the largest range of roll wrapped carbon fibre tubes available to buy online. Sometimes however, the need arises for a carbon fibre tube of very specific dimensions, fibre type/orientation or appearance.
Providing the tube you wish to make has parallel sides or a continuous taper then it is possible to use the roll wrapping process to make your own bespoke carbon fibre tube without the need for any specialist machinery beyond a metal mandrel of the right size and an oven large enough to cure the tube in.
If, instead, you need to make a carbon fibre tube that is not straight, such as handlebars or a more complex tubular frame structure such as a suspension wishbone or bike frame then take a look at our tutorial on making a carbon fibre tube using a split-mould.
Explained below are the materials and processes used in the tutorial.
TUTORIAL BREAKDOWN
1. Metal mandrel
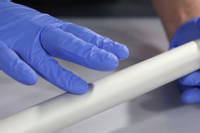
The roll wrapping process involves wrapping prepreg carbon fibre around a metal mandrel and so the starting point is to have a metal mandrel of the correct diameter for the size tube that you want to create. Because the carbon fibre will be wrapped around the outside of the mandrel, the mandrel itself needs to have an outside diameter that matches the inside diameter of the carbon fibre tube you will use it to make. The outside diameter of your carbon fibre tube will be determined by the amount of reinforcement (the number of layers) you wrap around the mandrel.
In the video we use an aluminium mandrel because the high coefficient of thermal expansion (CTE) of aluminium makes it well-suited to the roll wrapping process. Steel or other metals can be used but metals with higher CTE will make the process easier.
If you want to produce a tapered carbon fibre tube then you will most likely need to use a lathe to turn down a solid aluminium rod to create a tapered mandrel.
Once you have a correctly sized mandrel, ensure it is completely clean and as smooth as possible to aid with extraction. The mandrel should then be thoroughly prepared with a high temperature chemical release agent, such as Easy-Lease.
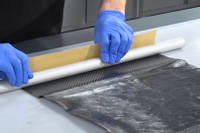
2. Prepreg carbon fibre
Although in theory it may be possible to use alternative types of reinforcements, such as a dry fabric wetted out with an epoxy resin, in practice only prepreg carbon fibre offers the precision and ease of handling required for the roll wrapping process.
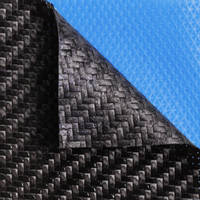
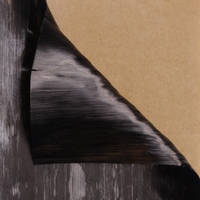
In the tutorial we use a layer of XPREG® XC110 210g woven prepreg on the inside of the tube, followed by several layers of XC130 300g unidirectional prepreg, finished with a final layer of the XC110 210g woven prepreg again on the outside of the tube. Because the woven prepreg has fibres oriented in the 0° axis (down the length of the tube) and in the 90° axis (around the circumference of the tube) these layers add what is known as hoop strength to the tube, making the tube less vulnerable to crush or burst forces and splintering. The bulk of the reinforcement, in the 0° axis, gives the tube its longitudinal stiffness.
By altering the layup to include more or less woven layers or by changing or alternating the orientation of the unidirectional plies allows the performance of the tube to be precisely optimised for its specific use. For example, a tube for a prop-shaft will encounter primarily torsional forces and so the unidirectional fibre can be aligned off-axis, at 45° for example, specifically to handle these forces.

3. Composites shrink tape
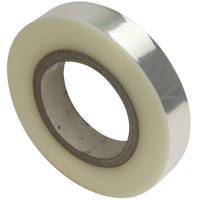
Once the prepreg carbon fibre reinforcement has been wrapped around the mandrel as tightly as possible, the reinforcement is then tightly wrapped with a composites shrink tape to provide further consolidation.
When applying the shrink tape it is important to ensure there is lots of overlap. Each wrap of the tape advances only a few millimetres down the tube. Although time consuming to do by hand, having lots of overlap in this way will provide much more consolidation pressure when the tape contracts during the cure.

4. Oven cure
Besides the mandrel, having an oven to cure the tube in is likely to be the main limiting factor when considering the roll wrapping process outside of a full production environment. However, unlike other prepreg processes, the roll wrapping process does not require precise temperature control or the multi-step 'ramp and soak' cure cycles often needed. Nor does the process require an active vacuum line into the oven. Therefore, the only requirements for an oven to cure a roll wrapped tubes are basic temperature control and sufficient size to fit the tube in. Depending on the size of the tube you want to make, anything from a domestic oven to a powder-coating oven could be used.
In the video tutorial, we're using our OV301 precision composites curing oven. The XPREG XC110 prepreg is loaded into the oven at 120°C, flat temperature, and allowed to cure for 1hr 30mins.
DISCUSSION (34)
Please share any questions or comments you may have about this video tutorial.
It could be done as a wet lay at room temperature for sure. With pre-preg, as in the video, you may find that for most off the shelf pultruded tubes, that the cure cycle temperature exceeds the heat resistance of the tube which could cause it to soften, distort or even crush during the cure cycle.
The manufacturing process for a prop shaft might well be very similar to the process shown in this video although the fibre orientation would be very different. For high-torque applications you would want the majority of the fibre to be spiralling around the tube (45 degrees for example) to resist the torque most effectively. The end fittings could be bonded to the tube using a variety of lap configurations (single lap, double lap, pocket lap etc.) or could even be designed to be laminated into the tube at the time (thus mechanically engaging the end fittings into the laminate).
For more conventional applications, like the strut brace, the end fittings would just be bonded onto the ends of the tube, again, using various lap configurations, according to requirement.
Hi Joel, no unfortunately this process won't work for anything other than a perfectly straight (although it can be tapered) tube. Anything with even a slight cure in would be impossible to remove from the mandrel.
The 'pro' way to make a curved tube would need to use an outer mould that can be split open. As processes go, it's quite a bit more involved. If you'd like to know more about this process, we produced a video tutorial on making a carbon fibre tube using a split mould already.
A more basic method, albeit with some compromises, would be to use some sort of sacrificial mandrel which you could shape as desired, then laminate carbon fibre and resin around. Once the resin is fully cured, you go about removing the mandrel. It's bit messy but one of the simplest ways to achieve this is using XPS (expanded polystyrene foam) to make the mandrel, then wrap it in some release film, then laminate dry carbon fibre cloth and epoxy laminating resin around the mandrel before wrapping the whole thing in shrink tape like you see us using in this tutorial. Once it's all cured, you can use a solvent like acetone to dissolve the foam. The release film will then pull out and you'll be left with a hollow, cured axe shaft.
I guess for completeness I should also point out that another option would be to leave the foam core in (if you chose to do this you wouldn't bother with the release film). An XPS core would only weigh a few grams so might not be a big deal to leave it in there and save the extra work.
LEAVE A COMMENT OR QUESTION
PRODUCTS USED IN THIS PROJECT
Although not necessarily an exhaustive list, the following tools and materials, supplied by Easy Composites, were used in this project.
The quantity shown below is the approximate amount used in the project rounded up to the nearest available kit size or quantity.
REINFORCEMENTS


DISCUSSION (34)
Please share any questions or comments you may have about this video tutorial.
It could be done as a wet lay at room temperature for sure. With pre-preg, as in the video, you may find that for most off the shelf pultruded tubes, that the cure cycle temperature exceeds the heat resistance of the tube which could cause it to soften, distort or even crush during the cure cycle.
The manufacturing process for a prop shaft might well be very similar to the process shown in this video although the fibre orientation would be very different. For high-torque applications you would want the majority of the fibre to be spiralling around the tube (45 degrees for example) to resist the torque most effectively. The end fittings could be bonded to the tube using a variety of lap configurations (single lap, double lap, pocket lap etc.) or could even be designed to be laminated into the tube at the time (thus mechanically engaging the end fittings into the laminate).
For more conventional applications, like the strut brace, the end fittings would just be bonded onto the ends of the tube, again, using various lap configurations, according to requirement.
Hi Joel, no unfortunately this process won't work for anything other than a perfectly straight (although it can be tapered) tube. Anything with even a slight cure in would be impossible to remove from the mandrel.
The 'pro' way to make a curved tube would need to use an outer mould that can be split open. As processes go, it's quite a bit more involved. If you'd like to know more about this process, we produced a video tutorial on making a carbon fibre tube using a split mould already.
A more basic method, albeit with some compromises, would be to use some sort of sacrificial mandrel which you could shape as desired, then laminate carbon fibre and resin around. Once the resin is fully cured, you go about removing the mandrel. It's bit messy but one of the simplest ways to achieve this is using XPS (expanded polystyrene foam) to make the mandrel, then wrap it in some release film, then laminate dry carbon fibre cloth and epoxy laminating resin around the mandrel before wrapping the whole thing in shrink tape like you see us using in this tutorial. Once it's all cured, you can use a solvent like acetone to dissolve the foam. The release film will then pull out and you'll be left with a hollow, cured axe shaft.
I guess for completeness I should also point out that another option would be to leave the foam core in (if you chose to do this you wouldn't bother with the release film). An XPS core would only weigh a few grams so might not be a big deal to leave it in there and save the extra work.
LEAVE A COMMENT OR QUESTION
100% SECURE
PAYMENT METHODS
Easy Composites EU B.V., registered in the Netherlands 73601195. All content copyright (C) Easy Composites Ltd, 2025. All rights reserved.
