Need any help or advice?+44 (0)1782 454499
PRODUCTS USED IN THIS PROJECT
Although not necessarily an exhaustive list, the following tools and materials, supplied by Easy Composites, were used in this project.
The quantity shown below is the approximate amount used in the project rounded up to the nearest available kit size or quantity.


VIDEO TUTORIAL
How to Stop Carbon Fibre Cloth from Fraying and Distorting
If you've ever worked with dry carbon fibre cloth then you will know all about this!
Carbon fibre fabrics are prone to distortion and fraying when handled, meaning that it's impossible to achieve crisp, sharp edges or clean cuts. This video demonstrates how to achieve a much more stable fabric which is easy to handle without distortion, doesn't fray at the edges and allows you to cut intricate shapes without the fabric falling apart. This process allows the user to achieve the arrow straight weave alignment and crisp cut line achievable with prepregs or stabilised dry fabrics.
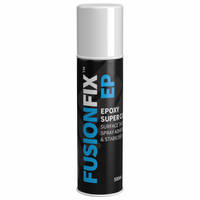
To stabilise the fabric we use FUSIONFIX™ EP an epoxy clear spray adhesive; for more information or to buy click here.
WHAT YOU WILL NEED
1. What You Will Need
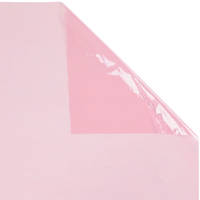
Before stabilising the fabric, cover the area with some release film to prevent the fabric accidentally sticking to the work area.
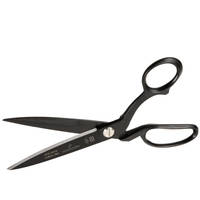
You will need carbon fibre shears and FUSIONFIX™ EP Epoxy Super Clear Spray Adhesive and the carbon fabric requiring stabilisation which cures to a tack free state.
TUTORIAL BREAKDOWN
1. Stabilisation Process
The stabilisation process is great for maintaining the fabrics shape during handling.
The process is very straightforward. Simply roll the fabric out onto the protective release film.
Holding the can of FUSIONFIX™ EP approximately 30cm (12") above the fabric, apply a light even mist over the entire piece.
For a more substantial stabilisation - similar to pre-stabilised fabrics like ProFinish – apply the light coat as before, then apply a second coat perpendicular to the first. This will ensure an even coverage of the entire fabric.
Once coated the fabric should be left for 20 minutes for the solvent to evaporate.
2. The Result
The fabric has lost all of its tack but the fabric is still quite soft and malleable which is a great time to work with it if you require the fabric to drape on compound curves and shapes.
The light coat has had a subtle stabilising effect, making the fabric that bit easier to handle. However, the weave can still be accidentally distorted and cut edges will still fray and come loose. The stabilisation wouldn’t be enough to allow for crisp cuts and joins. But it is a nice level of stabilisation if you’re working with compound curves and it still retains a good level of conformability of the dry fabric.
The more heavily coated fabric is noticeably more stable. This is much easier to handle without getting distortion and cuts cleanly with the edges much less likely to fray or come loose.
Although this more heavily coated fabric is quite robust at the 20 minute mark before being fully dried, it does still have some movement and will conform with some encouragement around compound curves and shapes.
3. Experimentation
As the adhesive continues to dry it will get slightly stiffer, so leaving the fabric for several hours can be the best option if you require a locked in weave for flatter panels and achieving sharp cuts and joins.
Stabilisation won’t always be the best option for the fabric used in your project as it will reduce the drapability of the cloth, making it harder to conform to compound curves.
It's recommended to experiment and work out when it’s the best option to stabilise the fabric and when it’s better to leave the cloth dry for different applications.
DISCUSSION (7)
Please share any questions or comments you may have about this video tutorial.
Yes the fusion fix spray will also help to bind the fibres of carbon kevlar, in fact it will work for pretty much any woven reinforcing fabric.
FUSIONFIX EP’s perfectly clear formula can be used to position reinforcements and core materials during resin infusion and other composites laminating processes, including the positioning of cosmetically critical reinforcements such as carbon fibre, directly onto the mould surface.
No, this won't help with pinholes on the surface of carbon fibre parts. The only solution to pinholes is to use a process that's capable of achieving a pinhole free finish, such as resin infusion or prepreg, and to make sure that the process is executed perfectly (capable materials, perfect bagging technique, perfect cure conditions etc.).
This is a great question and maybe something we could have discussed a bit in the video. The short answer is "no", you won't see any measurable reduction in mechanical properties of the laminate after using FusionFix EP either as a stabiliser, or as a spray adhesive within the laminate. The longer answer as to why this is the case is due to the adhesive being epoxy based. Although it dries to the touch after 10-20 mins, it hasn't actually cured or cross-linked at this point. It just leaves a few grams of uncured epoxy as a trace on the fabric. When the part is infused, the uncured resin will just become a fractional part of the resin matrix and cross link with the hardener, together with the rest of the resin. The amount of extra resin side is barely even a rounding error.
This has been verified by using the FusionFix EP between plies in the laminate and then testing the cured laminate using a rigorous 3-point bend test, looking for any reduction in interlaminar shear. The results showed no difference in mechanical performance between laminates that had used FusionFix EP and those that hadn't. For context, several studies have been done in the past on the effect of rubber-based spray adhesives (which most are) which did show measurable reduction in interlaminar shear strength of cured laminates, particularly epoxy-based ones which - having no solvent - are unable to dissolve and disperse rubber compounds.
It has been done with many generic spray adhesives but they all have potential issues in certain applications. Using the Fusion Fix EP does remove a lot of those issues. Once stabilised, the fabric can be used with most composite processes like wet lay, infusion and vacuum bagging.
In our experience, most composites spray adhesives tend to do well in terms of tack and holding the first layer onto the mould. However, non-epoxy based sprays can cause cosmetic issues which the Fusion Fix EP is designed not to cause. In our testing, Fusion Fix EP is a great spray adhesive for the first layer into the mould, even on slippery chemical release agents.
The same process will work on almost all fibre types using the Fusion Fix EP Spray Adhesive.
LEAVE A COMMENT OR QUESTION
PRODUCTS USED IN THIS PROJECT
Although not necessarily an exhaustive list, the following tools and materials, supplied by Easy Composites, were used in this project.
The quantity shown below is the approximate amount used in the project rounded up to the nearest available kit size or quantity.


DISCUSSION (7)
Please share any questions or comments you may have about this video tutorial.
Yes the fusion fix spray will also help to bind the fibres of carbon kevlar, in fact it will work for pretty much any woven reinforcing fabric.
FUSIONFIX EP’s perfectly clear formula can be used to position reinforcements and core materials during resin infusion and other composites laminating processes, including the positioning of cosmetically critical reinforcements such as carbon fibre, directly onto the mould surface.
No, this won't help with pinholes on the surface of carbon fibre parts. The only solution to pinholes is to use a process that's capable of achieving a pinhole free finish, such as resin infusion or prepreg, and to make sure that the process is executed perfectly (capable materials, perfect bagging technique, perfect cure conditions etc.).
This is a great question and maybe something we could have discussed a bit in the video. The short answer is "no", you won't see any measurable reduction in mechanical properties of the laminate after using FusionFix EP either as a stabiliser, or as a spray adhesive within the laminate. The longer answer as to why this is the case is due to the adhesive being epoxy based. Although it dries to the touch after 10-20 mins, it hasn't actually cured or cross-linked at this point. It just leaves a few grams of uncured epoxy as a trace on the fabric. When the part is infused, the uncured resin will just become a fractional part of the resin matrix and cross link with the hardener, together with the rest of the resin. The amount of extra resin side is barely even a rounding error.
This has been verified by using the FusionFix EP between plies in the laminate and then testing the cured laminate using a rigorous 3-point bend test, looking for any reduction in interlaminar shear. The results showed no difference in mechanical performance between laminates that had used FusionFix EP and those that hadn't. For context, several studies have been done in the past on the effect of rubber-based spray adhesives (which most are) which did show measurable reduction in interlaminar shear strength of cured laminates, particularly epoxy-based ones which - having no solvent - are unable to dissolve and disperse rubber compounds.
It has been done with many generic spray adhesives but they all have potential issues in certain applications. Using the Fusion Fix EP does remove a lot of those issues. Once stabilised, the fabric can be used with most composite processes like wet lay, infusion and vacuum bagging.
In our experience, most composites spray adhesives tend to do well in terms of tack and holding the first layer onto the mould. However, non-epoxy based sprays can cause cosmetic issues which the Fusion Fix EP is designed not to cause. In our testing, Fusion Fix EP is a great spray adhesive for the first layer into the mould, even on slippery chemical release agents.
The same process will work on almost all fibre types using the Fusion Fix EP Spray Adhesive.
LEAVE A COMMENT OR QUESTION
100% SECURE
PAYMENT METHODS
Easy Composites EU B.V., registered in the Netherlands 73601195. All content copyright (C) Easy Composites Ltd, 2025. All rights reserved.